Showing posts with label crochet. Show all posts

Monday, February 17, 2014

Knotty headband

I love headbands. They keep hair out your face, but still let you wear it down.
The problem I find is that most plastic headbands in stores give me headaches. 

Luckily I'm obsessed with yarn and hooks. And can make my own super cushy head gear. So I whipped one up yesterday afternoon whilst watching one of my favorite movies with excessive violence (I love them, what can I say?).

Supplies:
H hook
Red heart with love chocolate
Yarn needle

CH 70
DC in 4th ch from hook and each ch across
Ch 1, turn. DC in each DC across
Ch 1 turn. SC in each DC across
Ch 1 turn. DC in each SC across
Ch 1 turn. DC in each DC across
Ch 1 turn. SC in each DC across.
**at this point you can stop, as I did. Or you can keep going 2 rows of DC 1 until it's as wide as you like**
Fold the work in half and sew ends together, work the yarn back to first row, and SC around it.


At the center, pinch together the top and bottom, to create a cute pucker. Sew this area together. 


Fasten off and weave in ends. 
Now we create the center portion.

Chain 30, DC in 4th chain from hook and across.
**Ch 1, turn. DC in back loops across**
Repeat from ** for 4 more rows.

Wrap around the pinched area of the headband and sew ends together. Fasten off and weave in ends. 


Wear this adorable-ness anywhere you can and love it!!

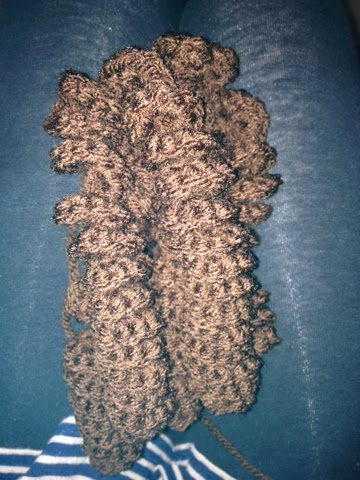
Curly Q


Since the famous groundhog has informed us that winter will go on, we have been hit with very cold temperatures here at home. A brief snow fall, though nothing like I have seen on the news happening up north. One more reason I am thankful to live in the Lone Star state.

A dear friend of mine admired the pig tail hats my twins wore on a recent outing.


How could one not be swept away by that adorable-ness?

She mentioned that her 3 year old daughter would love to have a hat like these.
So I set out to make one. Easy enough to get started, use a favorite DC beanie pattern.
The curly pig tails are really the only pattern I have for you. 

Supplies:
Red heart with love Chocolate
G hook
Yarn needle
Stitch marker

--make 2--

Start with magic ring, 8 SC into ring. 
Join to top of first DC with slip stitch
**Chain 45, 2SC in 2nd chain from hook, 3SC in each chain to beginning. Slip stitch to next SC of circle**
Repeat from ** in each SC of circle, until you have 8 curly tails extending from the inner circle.


Mark placement on hat with stitch marker, , mine start at round 6, but you can add them wherever you like.
Sew the curls to the hat, using the circle as a base. The curls should cover the circle when the hat is held upright, or worn.

Repeat with the other set of curls.

You can do a few things here, add ponytail holders, add ribbon, crochet a hair bow. Whatever you like.

In this case, I opted to make some crochet bows on hair clips so they could be worn with or without the hat.


Take a moment to wind this hot mess into a proper ball, trust me.

I used the same hook as above

Chain 30, SC in 2nd chain and across
Ch 1, turn. DC on each SC across
Ch 1 turn. SC in each DC
fold each end toward the middle and sew the ends together. Cut off a long length of yarn before binding off. 


Use the long length of yarn to create the middle portion of the bow by wrapping it around the center several times.


Fasten off and weave in ends.
Insert hair clip into a few layers of the center

Use the clip to affix the bow to the hat above the curly pig tail. Repeat with the 2nd bow.


Give your hat to an adorable model and enjoy the cuteness. 

Saturday, February 8, 2014

Summer baby and crochet dilema

Summer doesn't afford a lot of crochet chances for babies, especially when you live on the surface of the sun. I mean Texas.
Triple digit temps are the norm here, and having a baby wear adorable hats and booties is just mean. My babies have all been tiny space heaters, and prefer to spend the summer in onesies or tshirts and diapers only. Understandable, but a little sad since I have yarn and hooks hankering to make something for the new baby on the way. 

I considered a blanket, but it likely would only be a play blanket for a few months, so I put it off. I wanted something we could use right away. 

So I chose a lovey. But I wasn't sure what to make. My oldest boy had a puppy lovey he adored, my younger son had  a stuffed monkey in a sweater that he loved. New baby needed something different. We needed a shake up. So I poked around and around and around on the internet and found nothing. Same frog, puppy, monkey, bunny etc. But nothing new. I wanted new and different. I don't care much for super babyish stuff, and everything I found screamed BABY to me. 

Nothing jumped out at me, so I kept thinking and stewing. Then last night, inspiration struck. My older boys were running around in Ninja Turtle socks "playing Karate" (as they say). They love all things ninja, and even have ninja blankets that I made for them on their beds. Ninjas and boys. Boys and Ninjas. It's a thing apparently. Here are my big boys blankets, I will post on those later as well, because they are the first sewn blankets I made. Squee!


So I opted for a ninja on a blanket lovey. Something snuggly for new baby to cuddle, but "manly" for his grown up side. No doubt I will not have much snuggly baby time before he is running, jumping, and fighting his brothers. So it seems the best of both worlds, we can snuggle and nurse while playing with his ninja, and later he can undoubtedly use it to throw at his brothers as though it were a weapon. Boys use everything as a weapon you know. Jackets, blankets, pillows, shoes. It doesn't matter. If it can be thrown, it's a weapon.

I started with the blanket, I wanted a fairly open weave since he's a summer baby, so I opted for a Granny Square. Pretty easy. I like the patterns here: Purl Bee Granny Square

I made mine with a G hook, and some red yarn I had floating around. Honestly have no idea what brand it is, as it was given to me in a lot. It feels like Red Heart soft, but I am totally guessing. It's bright red. Red and black makes a good ninja combo I think. Plus I only had scraps of black, so it'll be perfect for the Ninja head and embellishments, but not enough to do the whole blanket. 

My square ended up 10 rounds and 12*12, that seemed like a good size for me, but it could always be larger or smaller depending on your feelings.

Then I made the ninja head. I kept using my G hook, as I find anything smaller makes me want to punch something when working at night time with black yarn. But you could go down a size and get a smaller head. It's up to you.

Here is the pattern I followed for the head:
Ninja Lovey

You can sew the ninja on now, or do the face first. I chose to crochet the face, though you could do it with felt if you felt (get it?) like it. 

I did not follow her pattern for the blanket, and chose to make it first, then the head and sew together later. Either option is fine, it's whatever you prefer. 


Sew your ninja head to your lovey. You could choose to be done here if you like, or you can add some embelishment. I like the idea of a Ninja star, and as it happens, my friend Corina at Stitch 11, has a great one: Awesome Ninja Star!

Make one or two of those bad boys and sew them on your lovey. Now give it to someone to cuddle, or in my case, put it in your "box of baby things" until baby comes in a few months 


Wednesday, February 5, 2014

Upton Uterus has an attitude problem

Last year I had a friend recovering from a hysterectomy. She and I have an odd sense of humor, so I knew I wanted to make her something that would make her laugh.

I chose to make a big uterus, with an angry facial expression. Seems weird, but I knew it would elicit quite the giggle, which she undoubtedly needed.

Here he is in all his glory:

He's angry!

As expected, she laughed and said he was a great comfort to her. Her teenage children were properly terrified when she told them what is was and decided to give a brief explanation of childbirth.

She commented that I should make one with a drawstring top to hold a baby and do childbirth education classes with it. Someday maybe.

Alas, I did not take notes as I was making him, so I need to remake another one and write down the pattern. I promise I will eventually. But for now, enjoy the anger of Upton Uterus.