Showing posts with label baby. Show all posts

Friday, March 21, 2014

Wool diaper cover

Wool Diaper Wrap Pattern


I love wool diaper covers, yes even in the heat. Wool is breathable, anti-bacterial, and easier to care for than often thought.

It makes amazing diaper covers over prefolds, fitteds, or even diapers with PUL to provide additional coverage for bed time. Wool can absorb without wicking to clothing or bedding, it doesn't need to be washed frequently. All around an awesome fiber for diapering.

Usually you see wool used as covers that look like pants or shorts. But as my baby is due in summer, I wanted something with less leg coverage. Although wool is great in summer, I like to have less on the skin as my babies tend to be little heaters. 

I decided I wanted a wrap style cover as they allow for the most customizable fit, which is nice for babies.

I didn't find a pattern I liked, so I made one. It's a small size, with a waist of 13 inches unstretched and a rise of 14 inches unstretched. Another awesome thing about wool is that it has great stretch. So this should fit for quite a while. 

Let's get started.


Supplies:
·        I hook
·        G hook
·        I love this wool in Bravo-1 skein
·        I love this wool in Smoke-1 skein
·        Yarn needle
·        Closure option- I will be using a Snappi, you could sew on buttons or snaps if you like.

Pattern is worked in rows.

Pattern:

With I hook, chain 36, SC in 2nd chain from hook and each ch across (34 sc)
Row2: SC in each SC across, turn
Row3-12: repeat row 2 piece should measure 3 inches long
Row13: sc 3sc together (insert hook into first sc from hook, yarn over pull up loop, insert hook into next sc, yarn over pull up loop, insert hook into next sc, yarn over and pull through all loops on hook), sc until 3 sc remain, sc last 3 sc together.
Row 14: sc across, you should have 14SC
Row15-24: repeat row 14 eight times.  
Row25-58: sc in each sc across, turn repeat row

Now the edging:

Change color if you like

Using I hook still, dc around the entire cover in the end of every row

Edging row 2: switch to G hook, turn your work and go the other direction now: sc in each DC around until you get to the decrease rows, FPDC BPDC two together, then sc around to the other side. When you get to the other side of the decrease rows, FPDC BPDC two together, sc around. When you get to the beginning, turn and work the other direction
Edging row 3: sc around until you get to the legs, sc two together 3 times then sc around to the other side and repeat. Sc to the beginning of the row, turn
Edging row 4: working the other direction, sc around. Fasten off, weave in ends.


As my baby isn’t here yet, your action shot will not be as adorable, but here is the finished item on Eeyore. A Snappi works wonderfully here to keep it closed, and as you can see, we get a lot of stretch on the wings and in the legs. This will allow for an awesome fit if baby has chicken legs, or chunky monkey thighs.


Saturday, February 8, 2014

Summer baby and crochet dilema

Summer doesn't afford a lot of crochet chances for babies, especially when you live on the surface of the sun. I mean Texas.
Triple digit temps are the norm here, and having a baby wear adorable hats and booties is just mean. My babies have all been tiny space heaters, and prefer to spend the summer in onesies or tshirts and diapers only. Understandable, but a little sad since I have yarn and hooks hankering to make something for the new baby on the way. 

I considered a blanket, but it likely would only be a play blanket for a few months, so I put it off. I wanted something we could use right away. 

So I chose a lovey. But I wasn't sure what to make. My oldest boy had a puppy lovey he adored, my younger son had  a stuffed monkey in a sweater that he loved. New baby needed something different. We needed a shake up. So I poked around and around and around on the internet and found nothing. Same frog, puppy, monkey, bunny etc. But nothing new. I wanted new and different. I don't care much for super babyish stuff, and everything I found screamed BABY to me. 

Nothing jumped out at me, so I kept thinking and stewing. Then last night, inspiration struck. My older boys were running around in Ninja Turtle socks "playing Karate" (as they say). They love all things ninja, and even have ninja blankets that I made for them on their beds. Ninjas and boys. Boys and Ninjas. It's a thing apparently. Here are my big boys blankets, I will post on those later as well, because they are the first sewn blankets I made. Squee!


So I opted for a ninja on a blanket lovey. Something snuggly for new baby to cuddle, but "manly" for his grown up side. No doubt I will not have much snuggly baby time before he is running, jumping, and fighting his brothers. So it seems the best of both worlds, we can snuggle and nurse while playing with his ninja, and later he can undoubtedly use it to throw at his brothers as though it were a weapon. Boys use everything as a weapon you know. Jackets, blankets, pillows, shoes. It doesn't matter. If it can be thrown, it's a weapon.

I started with the blanket, I wanted a fairly open weave since he's a summer baby, so I opted for a Granny Square. Pretty easy. I like the patterns here: Purl Bee Granny Square

I made mine with a G hook, and some red yarn I had floating around. Honestly have no idea what brand it is, as it was given to me in a lot. It feels like Red Heart soft, but I am totally guessing. It's bright red. Red and black makes a good ninja combo I think. Plus I only had scraps of black, so it'll be perfect for the Ninja head and embellishments, but not enough to do the whole blanket. 

My square ended up 10 rounds and 12*12, that seemed like a good size for me, but it could always be larger or smaller depending on your feelings.

Then I made the ninja head. I kept using my G hook, as I find anything smaller makes me want to punch something when working at night time with black yarn. But you could go down a size and get a smaller head. It's up to you.

Here is the pattern I followed for the head:
Ninja Lovey

You can sew the ninja on now, or do the face first. I chose to crochet the face, though you could do it with felt if you felt (get it?) like it. 

I did not follow her pattern for the blanket, and chose to make it first, then the head and sew together later. Either option is fine, it's whatever you prefer. 


Sew your ninja head to your lovey. You could choose to be done here if you like, or you can add some embelishment. I like the idea of a Ninja star, and as it happens, my friend Corina at Stitch 11, has a great one: Awesome Ninja Star!

Make one or two of those bad boys and sew them on your lovey. Now give it to someone to cuddle, or in my case, put it in your "box of baby things" until baby comes in a few months 


Thursday, February 6, 2014

Puppy Love Part 2

Puppy love part 2: the pants

I went easy with this one, use existing pants, trace around, sew together. done and done.

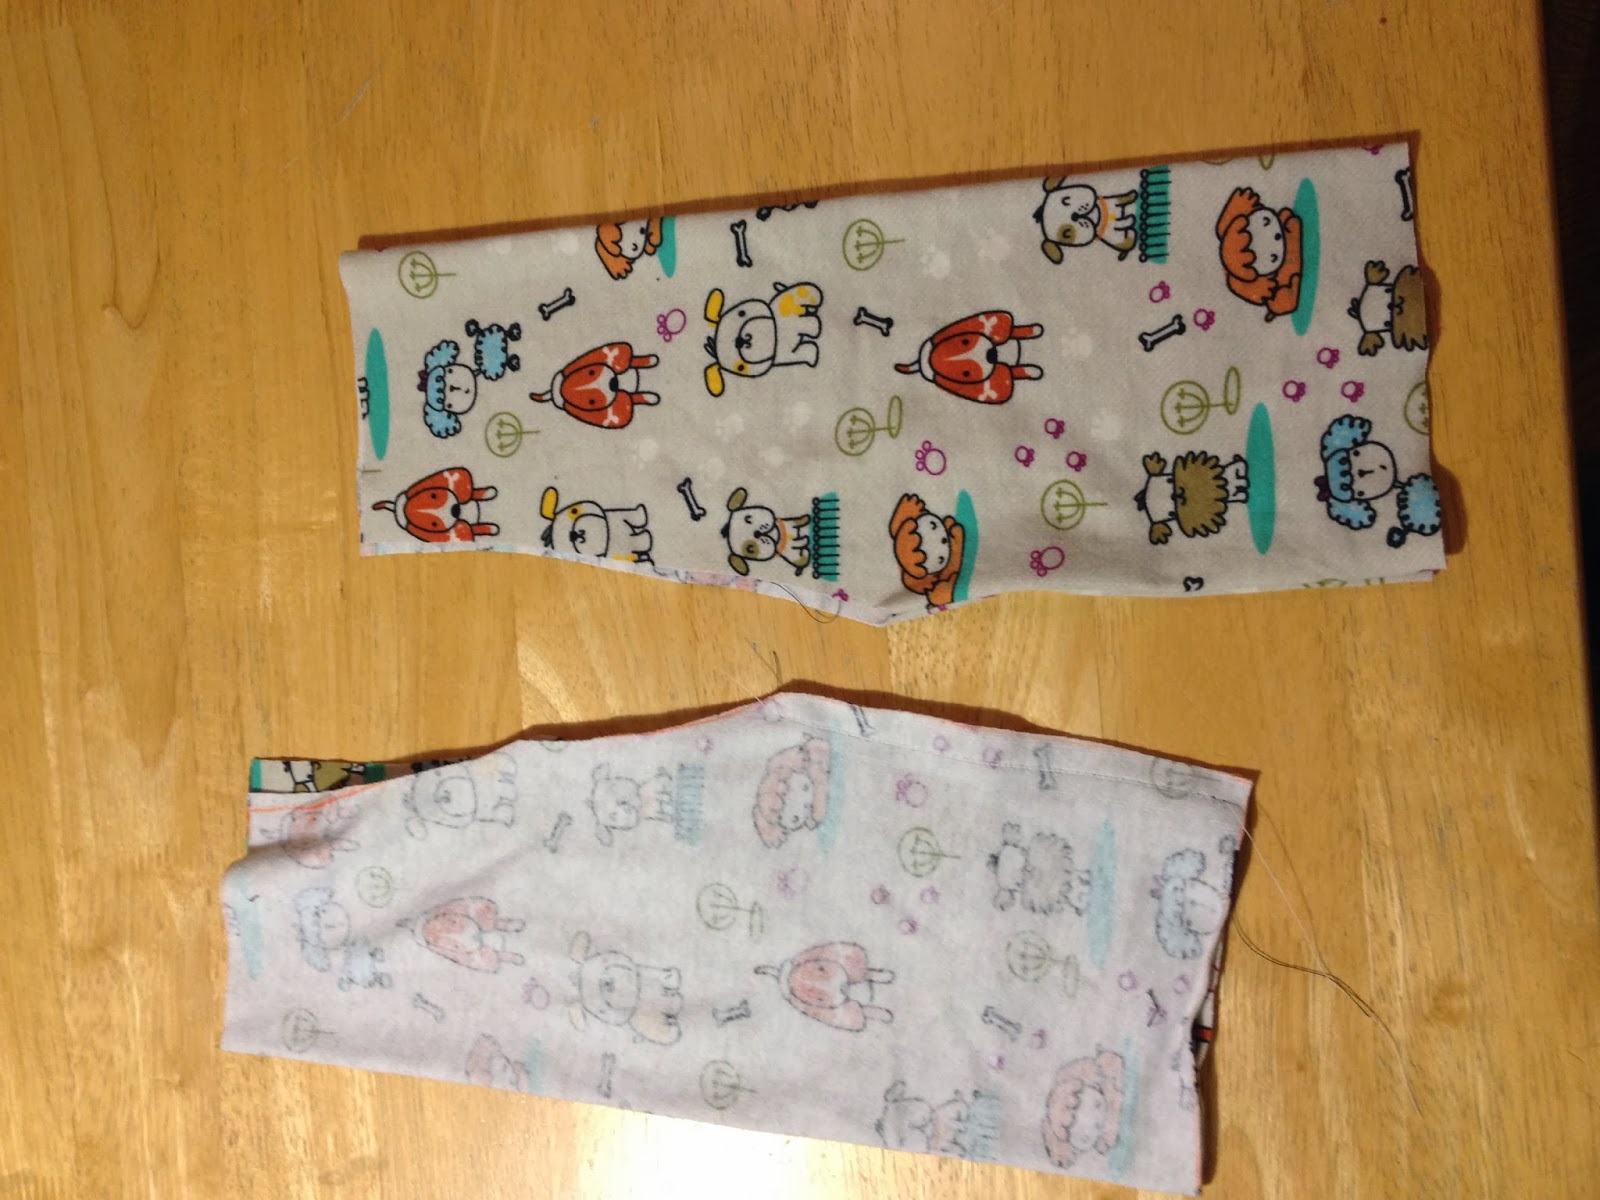
So I grabbed some pants, laid them out on the side, and drew on my fabric to get two leg pieces.

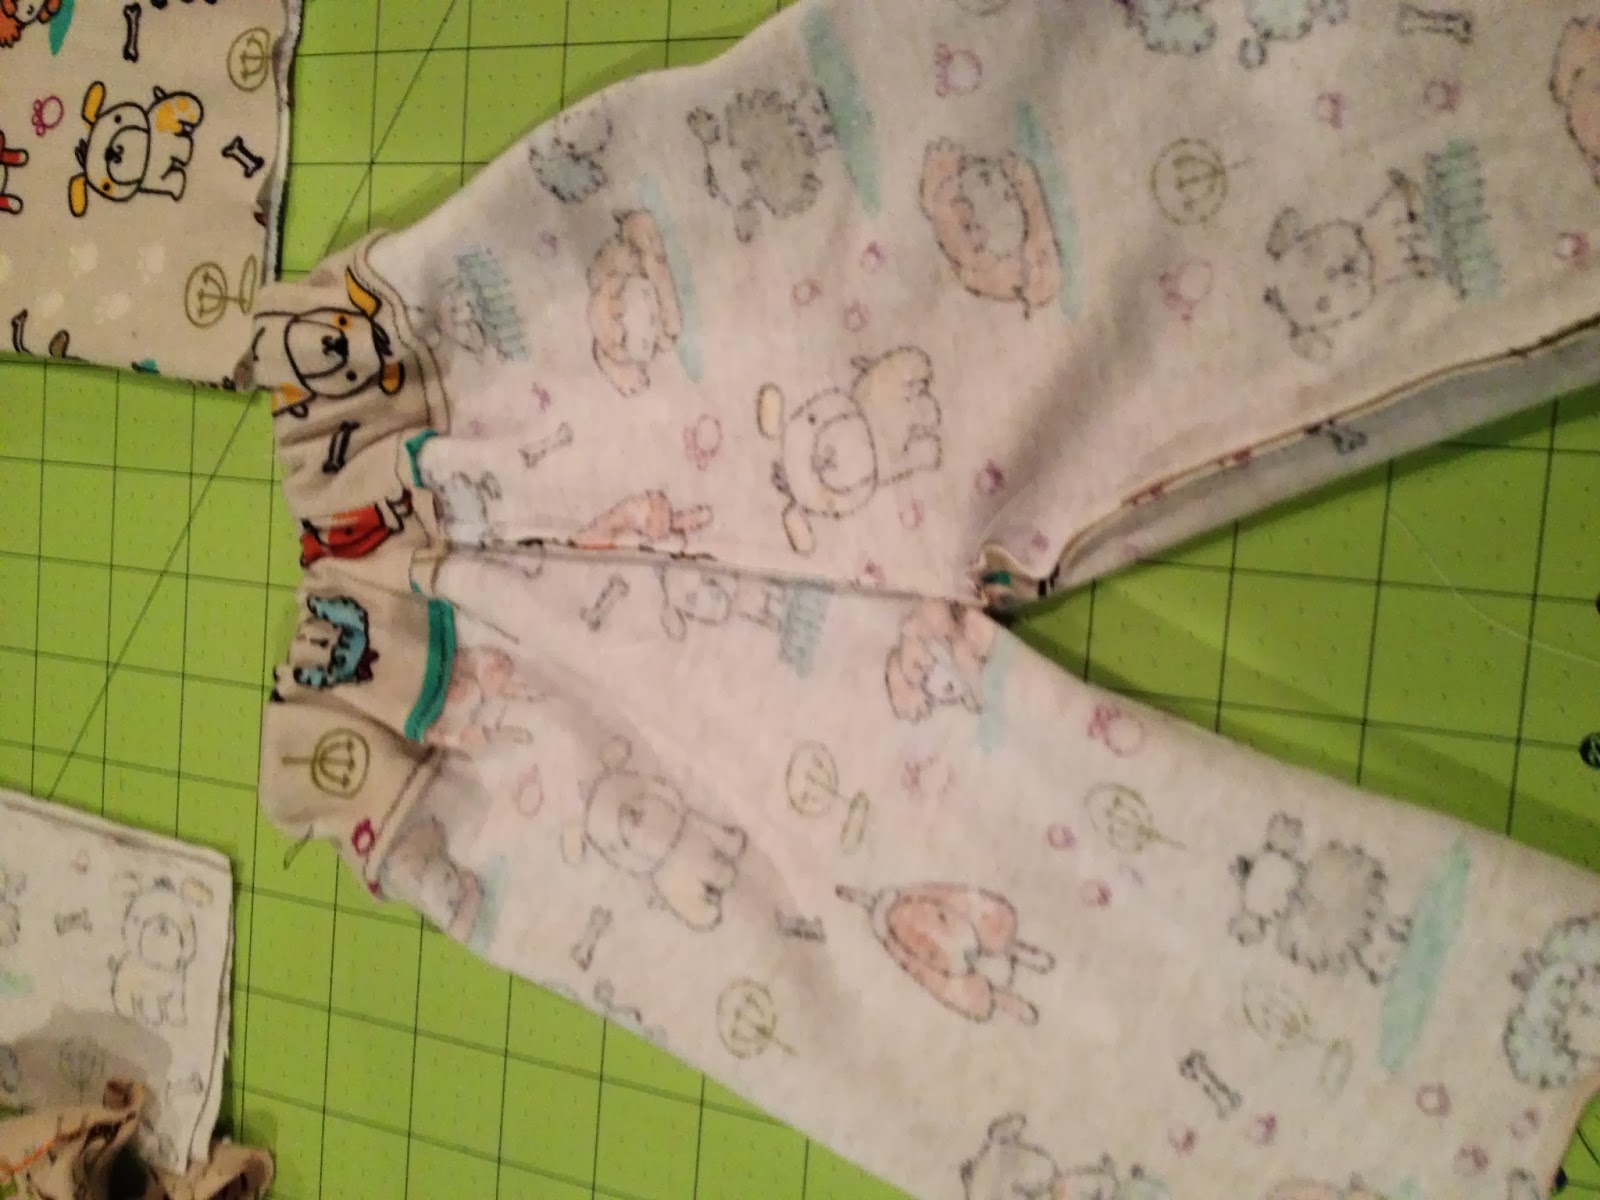
Sew up the leg sides on both legs, then turn one leg inside out. Place the right side out leg inside the inside out leg, so right sides are facing each other and begin pinning the crotch seams together. 

Sew up the U shape crotch and then flip the pants inside out again.
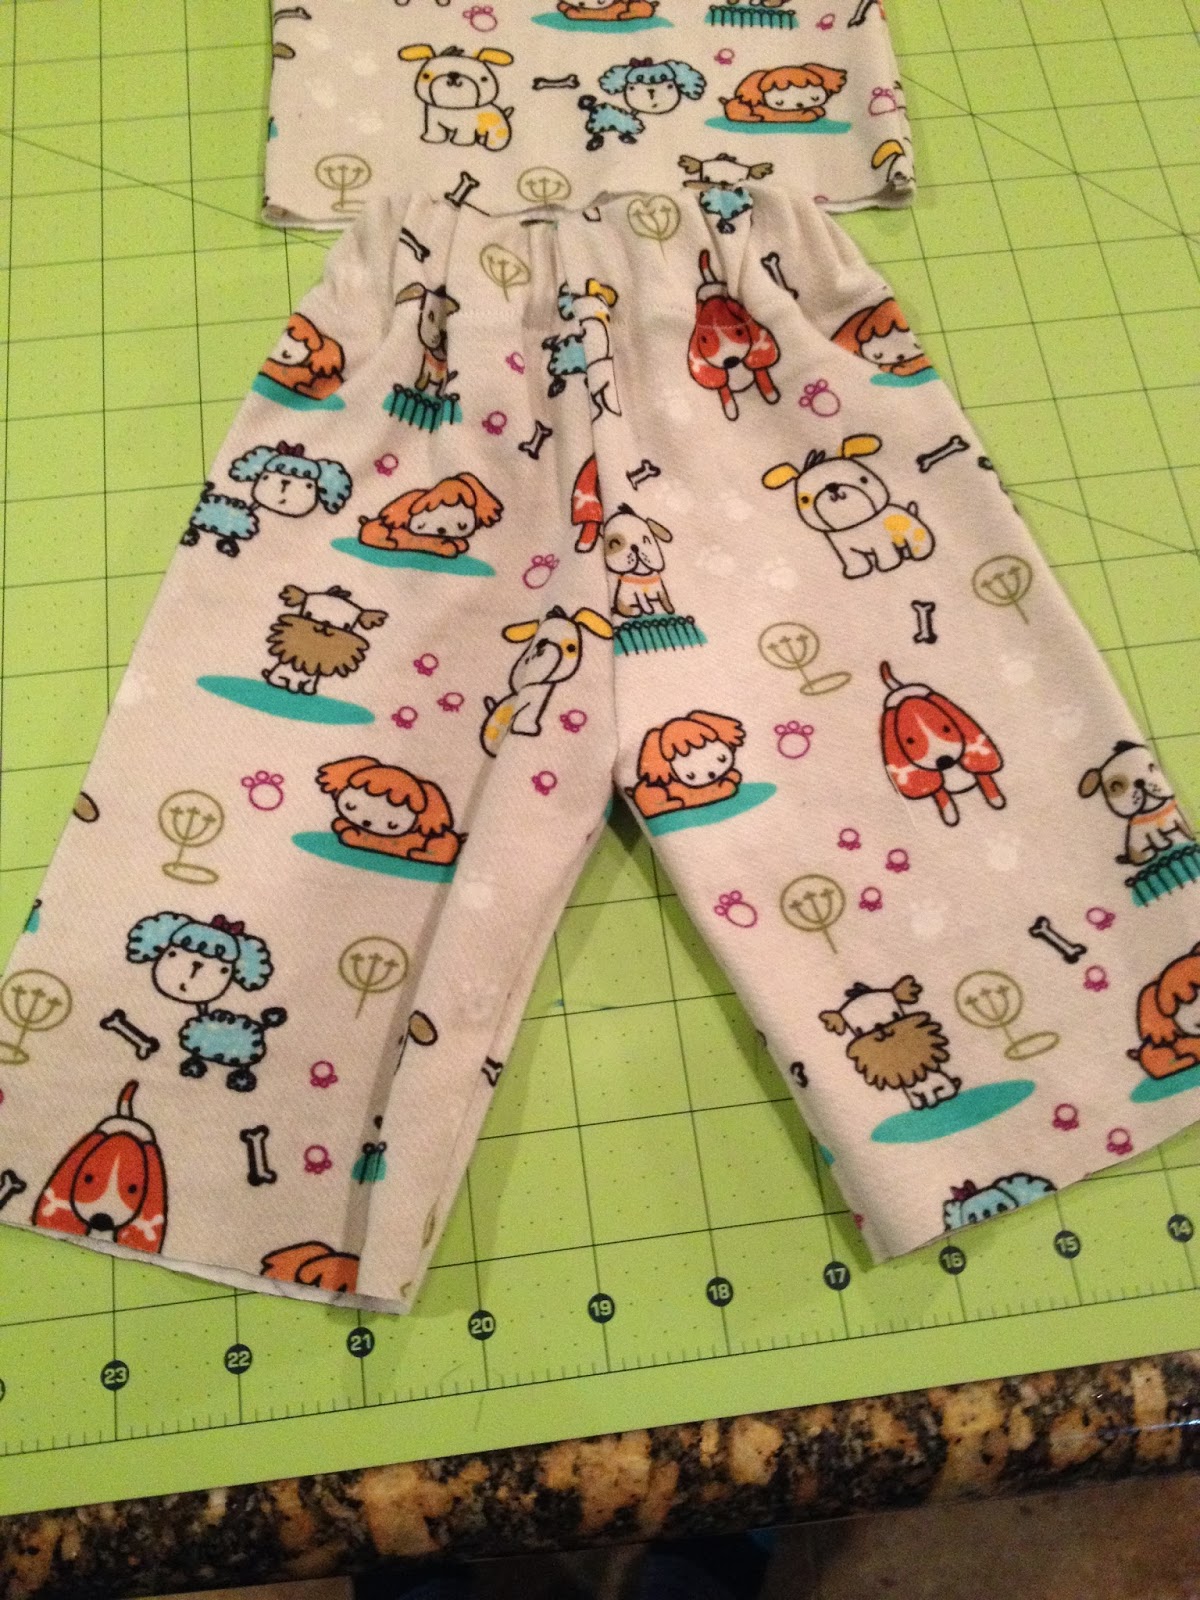
For the elastic waist, I folded down an inch and a half, using that half inch to fold in again for a clean edge. Then sewed a casing. I measured my elastic a few inches smaller than the waist. You don't want it pulled so tight you can't get them on over baby, but not so loose they fall off. Depending on the amount of stretch your elastic has, typically a few inches smaller is perfectly fine to get the fit you want.
Then I used the old safety pin and elastic method to insert the elastic into the casing. Zig-zagged the elastic ends together, and sewed casing closed. 

Turn them right side out and love them!
Once again, I chose not to hem these because I was not sure how long they would need to be since baby is not here yet, but also un-hemmed could get us more use out of them, after summer time. I can always hem later after baby comes if I choose to.

Can't wait to see my little man in these. Maybe even with a matching diaper underneath?

Puppy Love

Sewing for newborns is fun, and addictive I am learning.

I had purchased a yard of this knit fabric from Joann's
and made a few diapers, but was still left with a lot of fabric. I knew it would be perfect for clothing, but wasn't sure what to make. I don't like gowns on babies, and being due in the summer, I didn't really want footed sleepers either.

So I opted for a shirt and pants, I could later shorten the pants to shorts if I wanted, or not. If not, I will get longer use out of them, so win win.

I had made a jumpsuit for a friend before, but wanted this two a be a two piece option to allow for more options in the summer heat.

I chose this pattern for the shirt:NB-2T shirt pattern
It works wonderfully with knits, and having used patterns from this site before, I was confident it would be well drawn and would fit very well.

I cut out my pieces one day, and began to sew it together later, thankfully this is easy enough to do, even if you don't do it all at the same time. Frequently my projects are broken up over several days, so I like easy to make things.

I chose to use the same material to make my binding because A: I didn't have any other knit, and B: I just liked it.

So I got to work, I cut a strip 1 inch wide and pinned it right side to wrong side around my collar piece:


My machine has a knit stitch, it looks like a little lightning bolt. Perfect for working with knits (#3 shown below).

I sewed the back of the binding onto both collar pieces and then began folding and pinning the fronts. I prefer to work in assembly line style doing all the pieces that involve the same steps, but that's just a preference. You certainly could work the front piece and then the back. Your call.

After the back is sewn down, you want to fold the binding strip to the front, and under to create a nice binding edge.


Then sew the front portion down, again with the knit stitch. This allows the collar to stretch and move around baby's head without popping stitches. DO NOT PULL the fabric here, let the machine do the work. Speaking from experience, I can tell you, if you pull the fabric from either side, you will stretch and pucker, and ruin it. Been there, done that.
It looks a little wavy here, but it did flatten out. Just a poor picture. Then I trimmed my excess off the ends, I'd left them longer on purpose, but now it was time to let them go.

Now you create the envelope neckline so familiar with baby shirts. You want to lay your pieces on top of each other, overlapping at the shoulder binding.
Sew your shoulder seams. and if needed, cut away any excess from the points. Then you begin the arms.
Pin your arm pieces at the shoulder, ensuring the points of the armholes all line up.

Sew your arms to the shirt, and turn it wrong side up. I had cut long sleeves, and chose to shorten them at this point. Folding and hemming tiny sleeves after they are sewn together can be daunting, so I chose to hem now. I did the super scientific method of using an existing onesie to measure how long to make them:


Hem your sleeves, and then you are ready to sew up the sides and bottom.

Trim away any excess here, and then you can hem the bottom. I chose to leave mine unhemmed because I want to get longer wear out of it, and knit does not fray.


Notice the collar is looking flatter already, after a wash and dry it lays flat. 

Coming Soon: Sewing the pants to match

Wednesday, February 5, 2014

Sewing for the baby

Baby #7 is on his way and I need to get crackin'!

I have tons of left over boy stuff because I learned a long time ago that when you have, or expect to have, a large family, you don't get rid of clothing until it is dead. Kids clothes really can last for awhile because they grow so quickly. I have a tote full of boy clothes. But weirdly I have no newborn or small stuff. It all starts at 6 months. 

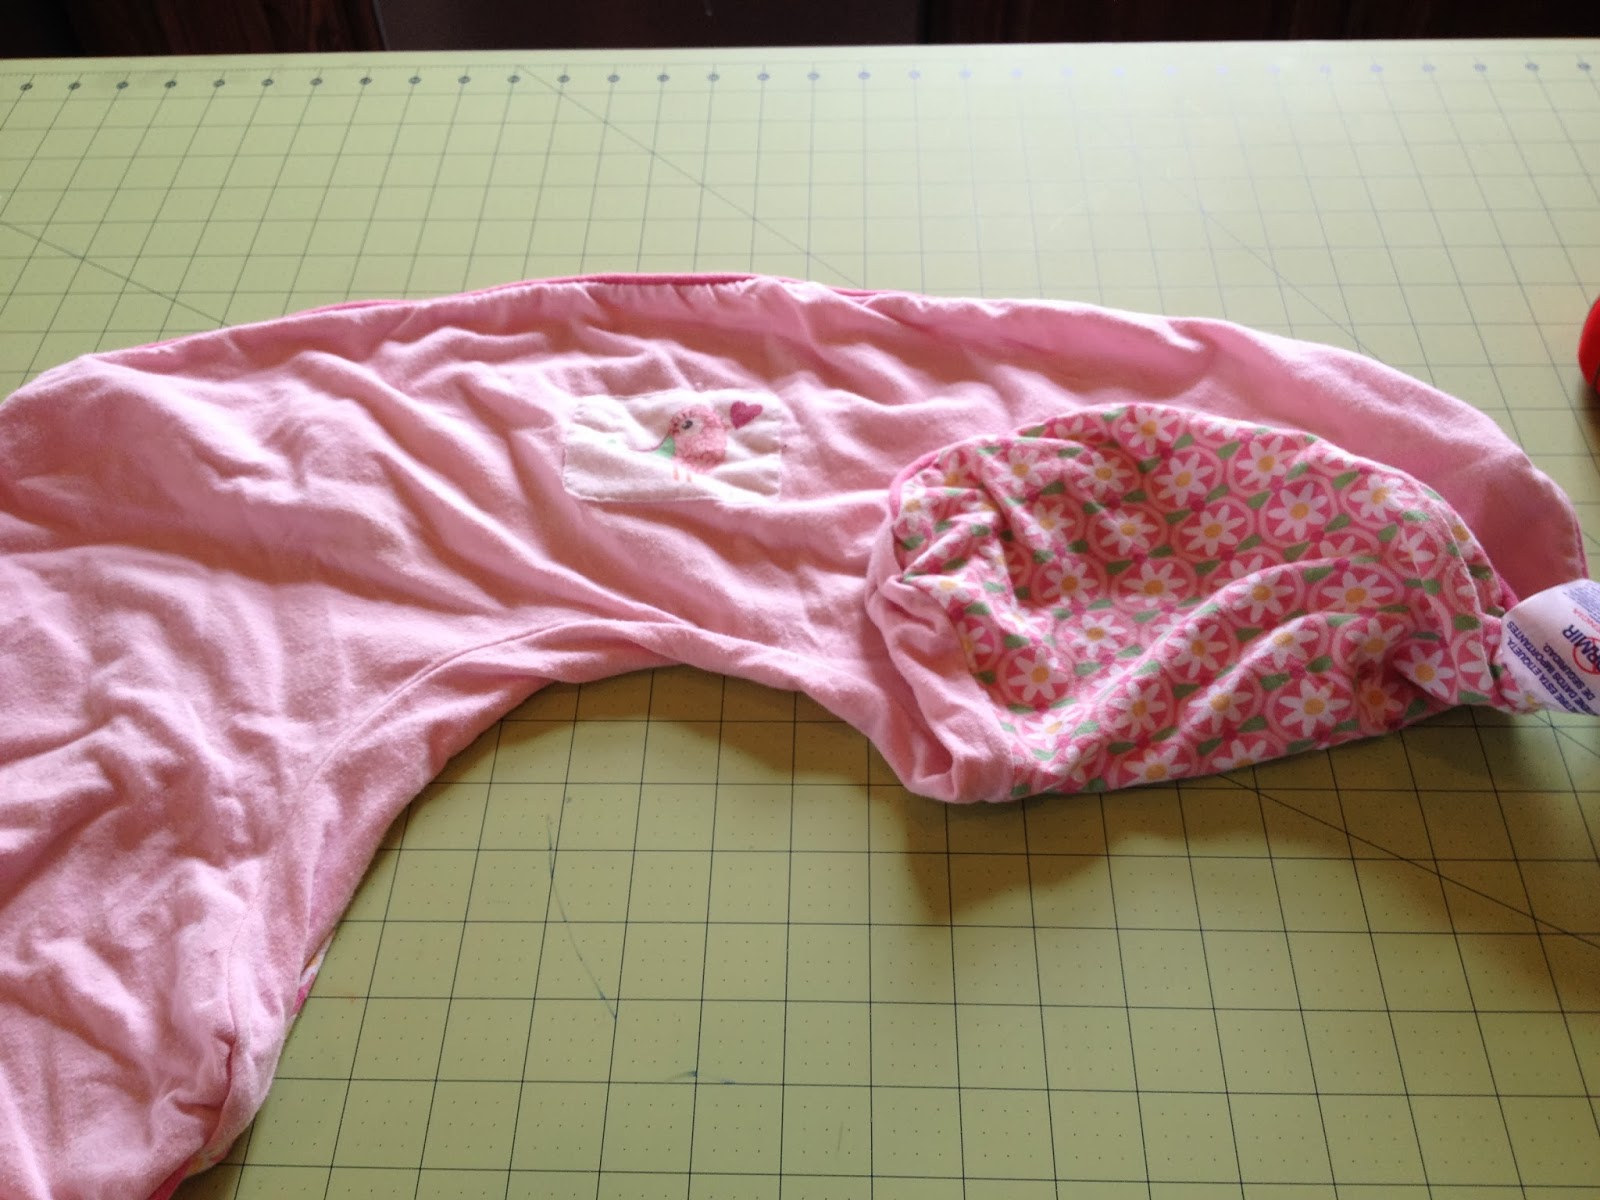
I also do not have some boy basics, like blankets and a Boppy cover. I do have the Boppy pillow, in fact, I had to buy a second one when the twins came. But I could not find a boy cover I liked. And the ones that were "ok" were, in my opinion, far too expensive for what is basically a pillow case. A curved pillow case, but still a pillow case.

$11 for a pillowcase? I think not

So I decided I could make one. It couldn't be hard right? I had a girly cover:


So I could, seemingly, wing it and make one. I looked online, certainly someone had done this before. Sure enough there were tons of tutorials. But they all seemed to link back to one in particular:

Boppy cover pattern

I opted to print the pattern and save any heartburn later. But I knew I didn't want a zipper. I wanted easy on easy off. So when I cut my fabric, I added 2 inches to the bottom portion of the pattern to allow for it to fit inside where the top portion was, in lieu of zipping closed.

My fabric came from the clearance rack at my local Wal-Mart. It was 86 cents a yard. Seriously who could pass that up?

It took a yard and some change (actually it took a yard, I bought extra because it was 86 cents).

Somehow I ended up with a back piece that was much larger than the front, so I trimmed it down and sewed it together in the middle trying my best to match up the chevron pattern.

Then I got to  sewing. First I hemmed the two areas where the zipper would have been, just a simple fold and hem job there. Then I sewed the front and back together as usual. Flipped it inside out and I was ready to go. 

Excuse the wrinkles, it's been tucked away in a box.


See how it looks like the zipper is holding it on? That's what I was going for, it's snug enough to stay put without it, and easier to take on and off. I need to make another because this one is bound to get dirty. Perhaps I can snag some more 86 cent fabric and get to work.

Tuesday, February 4, 2014

Stars and Hexagons

      When the twins were a few months old, I decided I wanted to make them blankets. It can get cold here in Texas, and even at a year old, they were still in their infant car seats. This meant a lot of carrying from the car to the house in the seats, and using those seats in the double stroller. So I wanted something that could be used in the car seats.
      I wanted a blanket that would be warm enough for while they were in the seats, but small enough to fit inside the seats without worrying about them being covered. I also wanted something beyond a standard square or rectangle.
     I went to Hobby Lobby and decided on color combos before I had patterns picked out. Sometimes colors lead to a pattern, sometimes a pattern leads to a color combo. You never know how inspiration will strike.
  I chose these two color combos:


And then I set out to find patterns.
I opted to make two different blankets, so I settled on a star for my first one. At this point I’d made simple rectangle blankets and hats. But nothing more involved than that. Never even a granny square. But it seemed easy enough, and pretty. So I picked out this pattern:
Star Blanket
And got to work.


Here is a great tutorial for the first few rows if the pattern is confusing, which it can be if you’re like me and want to see it “in person”
Tutorial


For the next one, I opted for a hexagon, again something I had never done before. I like a challenge. I chose this pattern:
Hexagon Blanket

And set out.

Overall it took me about 4 days to finish both blankets working on my lunch break and at night after the kids were in bed. They are not overly large, big enough to use in the car seats. We still use them in the car today. They are the perfect size for that.
Here they are after a year and some change in use, still holding up very well. This yarn washes wonderfully. I have had no fuzzing or pilling as can happen with some yarns. Yet another reason I love Hobby Lobby products!

They do lay flat I promise. 


Tuesday, January 21, 2014

A new favorite?

Today I wanted to talk about a new diaper I have discovered, that is in close running with my Thirsties AIO to be a favorite; the Diaper Rite All In One One size diaper.

   I admit to being a bit of a “lazy” diaperer. I need the easiest and fastest way to change diapers; I have 2 year old twins who quickly lose their patience for folding and pinning. We need easy on easy off. So I looked at All in ones. I had done pockets before, but after 4 years and 5 kids, I was so over stuffing pockets. I know it doesn’t take that long, but honestly it was longer than I wanted to spend doing it.

  All in ones seemed like a great choice, but can be very costly, especially when you are diapering more than one child. So I went on the hunt for an economical choice to test them out before I took the plunge.
  I had tried the Imagine bamboo AIO and while I liked them, I had issues. My children are sensitive to wetness, so I needed to add a liner to them. And the Velcro wasn’t lasting long. My issue with snaps on the    Imagine diaper is that I need crossover snaps, not something offered by a lot of diapers. Hip snaps are a must to prevent wing droop, and my kids are petite in the hips, so cross over it a must.

   I had some Diaper Rite covers, so I was poking around on http://www.diaperjunction.com/ to see what they carried in the way of all in ones. Lo and behold, they made their own. And it was affordable. I ordered on Black Friday and paid $8.95 each, but even full price was only $11.95. Can’t beat that. So I bought 2 to test out, if it didn’t work, no biggie.

   They arrived and I was skeptical at first, they seemed thin. But I liked the design. I love the front flap to hold the insert in; it’s great for preventing leaks for tummy sleepers. The insert doesn’t require any special folding to work.


   My twins are on the second rise setting at 2 years old and 21ish pounds. The insert fits beautifully in the diaper, and the flap holds any excess. The hip snaps give me a secure fit on the thighs without being so tight as to cause marks or pain. The cross over snaps allow for a great fit at the waist. Even when I add a doubler for bed time, I can let out the waist a bit and still have an amazing fit. I have tested these out on my 34lb 3 ½ year old, and they fit him as well. He’s potty trained, so I did not try them for function, but I would imagine they would work wonderfully as they do for the younger ones as well.


   These diapers have lasted overnight with an extra insert, nap time by themselves, and day time wear as if it were nothing. Hands down the best OS diaper I have owned. Easy to put on, easy to wash and care for. Great fit, great absorbency. Fantastic all the way around.


   The company has halted production to revamp the design a bit, I am holding out hope they don’t change any of the things I love, but I cannot wait to try the new ones. And I hope beyond hope that they will release a newborn size as well. 

I adore my Thirsties AIO and between those and my few DRAIO, they are the first diapers to get used out of the wash. It's a tough call as to which is my one and only favorite, I am not sure I can pick just one. 
Stay tuned for a review of the Thirsties AIO.

The Dryer Bar and cloth diapers


  So I've been cloth diapering since 2010, and have diaper 4 1/2 children. I say 4 1/2 because when I started using cloth, one of the kids was only in night time diapers. So she counts as the 1/2. I have diapered my 2 boys and my twin girls. And will cloth diaper baby #7 when he arrives this summer.

  I am by no means an expert, in fact I swear things change every few months, but I do have a reasonable amount of experience with cloth diapers. I have tried every type out there that I am aware of.
I love cloth diapers for several reasons, many of which I will talk about at some point here, while giving you my thoughts on all of them. Aren't you excited? I know I am.

  Having spent 4 years washing and using cloth, I thought I knew how to follow the rules. And I do. I never dry my PUL covers except on low, even my pockets I treated this way. I followed the rules. Day in and day out, followed the laundry rules.
But last week I pulled my covers out of the dryer and discovered this:


  Those are scrape marks on my PUL. Oh my stars I almost fell over! They aren't burns, I know the dryer was not too hot, it was on air dry no heat. I frantically searched to see if I had washed a snappi. Nope. Nothing. Queue minor (ok major, I love my cloth diapers) freak out and panic. I quickly emailed these two companies to see if they had any insight as to what I'd done wrong. No one had any idea, they believed, as I did, that I had followed all of their rules, and my covers should be fine. I wasn't looking for them to replace them, just ideas.

  I had pined over this FLIP cover in Albert for a year. Seriously. A year. Finally with a BOGO sale I bought two for the twins. And had used it less than a handful of times, only to see this. Ugh.

  I went back to my dryer to beg for answers. I opened it and closed it several times, I checked and rechecked all of the settings. I did everything I could think of, including ask it why it felt the need to attack my pretties.

  And then I saw it. Mocking me. My dryer bar. Faithfully I removed it every laundry day and set it above the dryer, so as not to risk fabric softener interfering with the absorbency of my diapers. This is a big no-no in the CD world. Everyone says remove the bar. Remove the bar. Remove the bar. I had done that. Every time I washed. But what no one said, was remove the bar holder. Because you can't.

  The beauty of the dryer bar system is that the holder stays inside the dryer at all times. And is in fact, horrific to try and take off. Awful. It doesn't come off, that is the point.

  That wondrous invention, that thing that made the act of using a dryer sheet obsolete, had ruined my diapers. As the covers tumbled around, on low or no heat as directed, they brushed up against the empty holder. Complete with protruding areas, that are not sharp, but do scrape nonetheless. And slowly, these areas has scraped away the waterproof layer of my PUL covers, and I would later discover that it had done the same thing to my wet bags. I could cry.

  I realize that sounds crazy, but I love my diapers. I've prided myself on diapering my kids cheaply for all these years. For not having tossed anything out until it had reached the end of it's life. And here I had hastened that life to come to an end, over something as insane as not using a dryer sheet! Oh the humanity!

  Thankfully these areas are small, and if the proper diaper is used  inside the covers, they don't leak, so they are still in the rotation for the time being. But I know I will have no choice but to toss them out when the time comes.

  I have yet to remove the dryer bar, as I said above, it is impossible. So for now, anything with PUL gets hung to dry. No dryer time at all. I can't deal with another heartbreaking PUL scrape.

  Learn from my mistake! If you have a dryer bar, hang all PUL. It may take longer to dry, but you will not suffer the heartache I have suffered.

  Just to make myself feel better, here is a picture of my twins wearing some adorable diapers.