Friday, March 21, 2014

Wool diaper cover

Wool Diaper Wrap Pattern


I love wool diaper covers, yes even in the heat. Wool is breathable, anti-bacterial, and easier to care for than often thought.

It makes amazing diaper covers over prefolds, fitteds, or even diapers with PUL to provide additional coverage for bed time. Wool can absorb without wicking to clothing or bedding, it doesn't need to be washed frequently. All around an awesome fiber for diapering.

Usually you see wool used as covers that look like pants or shorts. But as my baby is due in summer, I wanted something with less leg coverage. Although wool is great in summer, I like to have less on the skin as my babies tend to be little heaters. 

I decided I wanted a wrap style cover as they allow for the most customizable fit, which is nice for babies.

I didn't find a pattern I liked, so I made one. It's a small size, with a waist of 13 inches unstretched and a rise of 14 inches unstretched. Another awesome thing about wool is that it has great stretch. So this should fit for quite a while. 

Let's get started.


Supplies:
·        I hook
·        G hook
·        I love this wool in Bravo-1 skein
·        I love this wool in Smoke-1 skein
·        Yarn needle
·        Closure option- I will be using a Snappi, you could sew on buttons or snaps if you like.

Pattern is worked in rows.

Pattern:

With I hook, chain 36, SC in 2nd chain from hook and each ch across (34 sc)
Row2: SC in each SC across, turn
Row3-12: repeat row 2 piece should measure 3 inches long
Row13: sc 3sc together (insert hook into first sc from hook, yarn over pull up loop, insert hook into next sc, yarn over pull up loop, insert hook into next sc, yarn over and pull through all loops on hook), sc until 3 sc remain, sc last 3 sc together.
Row 14: sc across, you should have 14SC
Row15-24: repeat row 14 eight times.  
Row25-58: sc in each sc across, turn repeat row

Now the edging:

Change color if you like

Using I hook still, dc around the entire cover in the end of every row

Edging row 2: switch to G hook, turn your work and go the other direction now: sc in each DC around until you get to the decrease rows, FPDC BPDC two together, then sc around to the other side. When you get to the other side of the decrease rows, FPDC BPDC two together, sc around. When you get to the beginning, turn and work the other direction
Edging row 3: sc around until you get to the legs, sc two together 3 times then sc around to the other side and repeat. Sc to the beginning of the row, turn
Edging row 4: working the other direction, sc around. Fasten off, weave in ends.


As my baby isn’t here yet, your action shot will not be as adorable, but here is the finished item on Eeyore. A Snappi works wonderfully here to keep it closed, and as you can see, we get a lot of stretch on the wings and in the legs. This will allow for an awesome fit if baby has chicken legs, or chunky monkey thighs.


Wednesday, March 19, 2014

Silence is golden....sometimes


Silence is golden...sometimes


I have been silent for a couple of weeks now, not planned, but unavoidable.

We sold a home and bought a new one last week. That means the last two weeks have been spent packing, unpacking, dealing with unexpected things like keys not working, leaky fridges and such.

This is the second time I have moved during the third trimester and I have to say it's not easy or fun. I don't really do any of the hard labor of moving, but it is still exhausting. Never again. Unless, you know, I decide to.

We love the new home. We downsized a considerable amount, almost half. But we got one level which is something we desperately wanted. Having a large family makes home searching difficult at times, but the right one came to us at the right price, and it went as smoothly as it could  have. 

The kids love being here, the new school is amazing. No more bullying. It's wonderful.

The one level is fantastic for toddlers who want to walk everywhere. I no longer worry that they will sneak up a staircase before anyone sees them or disaster strikes. It's wonderful.

Now that unpacking is mostly complete, I hope to get back to a real routine and that includes spending more time here on the blog.

My creative juices have been needing an outlet but everything was packed away. I am hoping to have some new things to show everyone soon.

Later this week I will have a crochet pattern for you, as soon as I find the cords to get the photos to my computer. 


Wednesday, February 26, 2014

Sewing for baby: let's make a romper! Part 1


Sewing for baby:
Romper
Part 1


I mentioned before about this awesomely adorable fabric I got from This awesome fabric store!


    I had made a couple of diapers from it, but wanted some clothing too. It’s a great print, and a very thin knit, which is perfect for Texas Summer.


This time I opted for a one piece romper. Summer or not, one piece outfits are great on babies. No exposed bellies to worry about, no concerns over pants being too big and falling off (always a concern with my tiny little babies).

I searched around and didn’t find a good pattern I liked, so I was just about to eyeball one when I found this link on Pinterest. It’s Dutch, which I don’t speak, but the pattern is solid and pretty simple to follow even without written instructions. Of course you could translate it into English if you wanted.

I simply cut the pattern and then winged the rest.

Since mine is thin, I double up on the interior parts that will be inside the legs, I opted not to do a separate binding, so these pieces need to be sturdy enough to hold snaps, though I am leaving towards using buttons as a closure. I can’t decide yet.

I pinned a lot to help keep the fabric from rolling, used my trusty knit stitch and moved very slowly.

As this is a thinner jersey knit, it is prone to rolling, so you want to go slow and pay close attention that you are sewing through all the layers where wanted. Taking stitches out of fabric this thin is not fun at all.

You are sewing right sides together as you will flip them to the inside of the piece when done.

Sew all of the leg binding pieces, then move to the shoulder seams. Sew right sides together on both shoulders.


Pin your sleeves to the armsyce and sew those in.


Flip your piece so you are looking at the right side all laid out flat. Now bring right sides together and pin the arm and side seams at the same time.


I much prefer this method over inserting a sleeve into an existing arm hole, but if you prefer the other way, there is no reason that would not also work.


Sew the arms and side seams together.


We are almost done, we need to complete the binding edge on the legs, neck and front openings, hem sleeves and legs and we’ll be ready to dress up adorable babies.

**I do not own a serger, so my inside seams are typically finished with a zig-zag stitch or my machines version of the over lock stitch. However, as knit does not fray, and this is super thin with a tendency to roll, I did not do any seam finishing. Of course you should do whatever you like in regards to seam finishing.**


I had to put my machine away for a few days, but stay tuned, the completion of this is coming soon.

Tuesday, February 25, 2014

Pasta Night

Pasta Night


Thursday is pasta night at my house. It has been for years. We love pasta around here.
We also love garlic bread. 

I have recently gotten into making bread from scratch. It's fun, yummy and cost effective. Feeding a family of 8, soon to be 9, can be very expensive, and we are always looking for easy ways to save money. 
One of the easiest ways is to cut out convenience food. 
We have done that already, but certain things are too much to make from scratch. I had always thought bread was one of those things. Until recently.

I don't own a bread machine, nor do I think it would be effective for me to buy one. The loaves made with machines would last precisely 5 minutes and half of my family wouldn't get to eat any. They are simply too small. 

So I began to look around for bread making resources. Turns out, it's pretty easy to do. A little flour, some yeast and few other simple ingredients, time and an oven and you're on a roll (maybe literally).

Over the last few months I'd worked on several loaves, white and whole wheat. Once I found something I really liked, I decided to try my hand at garlic bread.


Most recipes I found meant purchasing a loaf of bread and simply adding butter and garlic salt. I knew how to do that, I was looking for something else. Something better. So I decided to try my hand at it on my own. 

And this is what I got:


Looks pretty good huh?

So here's a quick run down of what I did:
Gather ingredients: 
3 TBSP powdered garlic--to taste start with less and add more if you like, we ended up with 4 TBSP
1 C AP flour
2 C Whole Wheat Flour
1/2 TBSP Yeast
1 TBSP Sugar
1 tsp Salt
2 TBSP Butter
1 C Water warm plus 2/3 cup for later


To 1 cup warm water, add sugar and stir to dissolve. Then add yeast, give one quick stir then set aside for at least 10-15 minutes.
Mix both flours and salt in a bowl. Use a wooden spoon or mixer with paddle attachment. I prefer a good ol' wooden spoon. 

When you're time is up, your yeast mixture should look frothy and smell awesome:


Add garlic powder, butter (or oil if subbing) and yeast mixture to flour mixture and stir. Add 2/3 cup water and stir until your dough looks like this:


It should stick to itself, but not the bowl, spoon or your hands, and should be slightly springy.

Cover the bowl with a towel and keep in a warm place to rise for 2-3 hours. I like mine on top of the fridge. 

During this time period, my whole house smelled like garlic. It was wonderful. 

When time is up, dough will likely be double, stir a few more times with your wooden spoon and then place in greased loaf pan. Preheat the oven to 350 degrees, it's OK to do this after rising, the dough won't go bad waiting for the oven to warm. 

Cook 45-60 minutes, mine took about 50. Remove from oven and wait 10-15 minutes before moving loaf out of pan and onto wire rack to cool.

Serve warm with butter.


Monday, February 24, 2014

Sewing for toddler: Footless tights

Sewing for toddler: Footless tights

I love early spring time. It means warmer weather, but not sweltering heat. It means adorable dresses on baby girls, and fun had by all hanging outside.
But what it also means is chilly mornings and evenings bookending the warmth of the mid-day sun. So while it is too chilly in the morning to wear dresses with nothing on the legs, it is too warm mid-day to be wearing winter appropriate attire. It can sometimes make it hard to dress children for the day if you intend to leave the house in the morning and not return until later.

With boys it’s easy enough, jeans or cotton pants and you’re good to go. Girls are harder. Dresses are fun and adorable, but can be chilly on tiny toddler legs in the morning chill. But full on tights can be a pain, and too warm if they are of the wrong composition.

So what to do?

I have always worn footless tights in spring and summer. I like to have a little covering on my legs when we are going out and about as I find most businesses keep their thermostat lower than I am comfortable with. I also always bring a sweater to put on, but that’s another story.

Finding foot gear for my twins is hard. They are two years old, but petite for their age. Infant sizes are too short, while I find toddler sizes to be miles too large. Not to mention finding items in pairs that I like is proving harder unless I want to pay an arm and a leg for them.

I rarely dress the twins alike as most struggle to tell them apart without them being “color coded”.  So I try and coordinate as best I can. They have a handful of matching items, and even if they dress the same, the socks are different so as to assist with the differentiation.

Last week I decided I wanted some footless tights for the girls to wear with their dresses. But I couldn’t find any.  I looked at several stores, and even online and had no luck.

So I decided I would just make some. I happened to be at Target when the notion struck me, so I ambled on over to the women’s hosiery department and ogled the knee socks. They had an awesome selection, most on sale for under $3 a pair. Can’t beat that.

I picked out two matching pairs (for $1.75 EACH how nuts is that?!?). Since their dresses are different colors, the tights could match and we could still tell them apart pretty easily.

So I took my treasures home and got to work.


For these tights, we use the “knee” portion as the ankle, and the feet area as the waist. So first you want to cut the toes off.


Then cut along the middle portion of the foot up to the heel area. Do this for both socks.


Turn one sock inside out. Place the right side out sock inside the other, so the right sides are together and the heel areas are lined up. Pin like crazy all around this U shape.


My socks were fairly thin, so I pinned a lot. They shifted quite a bit while sewing, so you want to go slow and use a knit fabric stitch to allow for stretching.


Flip them inside out, and we’re almost done! In my case, the tights were tight enough with just enough stretch that they stayed on without elastic. Much like pantyhose. But you could do an elastic casing if you prefer.


Now find some cute toddlers to test them out on.


Mine are thin, so meant to be worn under dresses, but if you used a thicker sock, you certainly could use in lieu of pants. 

Friday, February 21, 2014

How to recover a tired pack and play


We bought a pack and play when I was carrying our second child. That was 7 years ago. Where or where did the time go?

Since that time, it has housed 5 children through early days of sleeping in our room and many months of play time. It has been well loved to say the least.

Before my 5 year old was born, I took off the original fabric used in the bottom, and replaced it with some thin fleece. I did this because our fabric had been damaged (though I don’t recall how). It was down and dirty job, done very quickly without much preparation or thought as we simply needed it to be functional again.

Now, it’s 5 years and 3 kids later, and the thing needs some love. Bad. The twins use it daily, though hopefully that will change once we move to a one story house, and they can spend more time free ranging all over the house without worries of stair climbing.

I’d been considering doing this for a while, but never had the nerve. What if I messed it up? Then we’d be down a place for the twins to play safely, and with a new baby coming to boot.

BUT, I also had this adorable Raggedy Ann flat sheet that came from my Grandmother’s house, and it was doing nothing. Sitting in a closet, not being loved. It was from  my childhood, and I treasured it, but I couldn’t bear  to do anything with it either. What if it got damaged?


So one night, I decided enough was enough, I was going to man up and do what needed to be done.
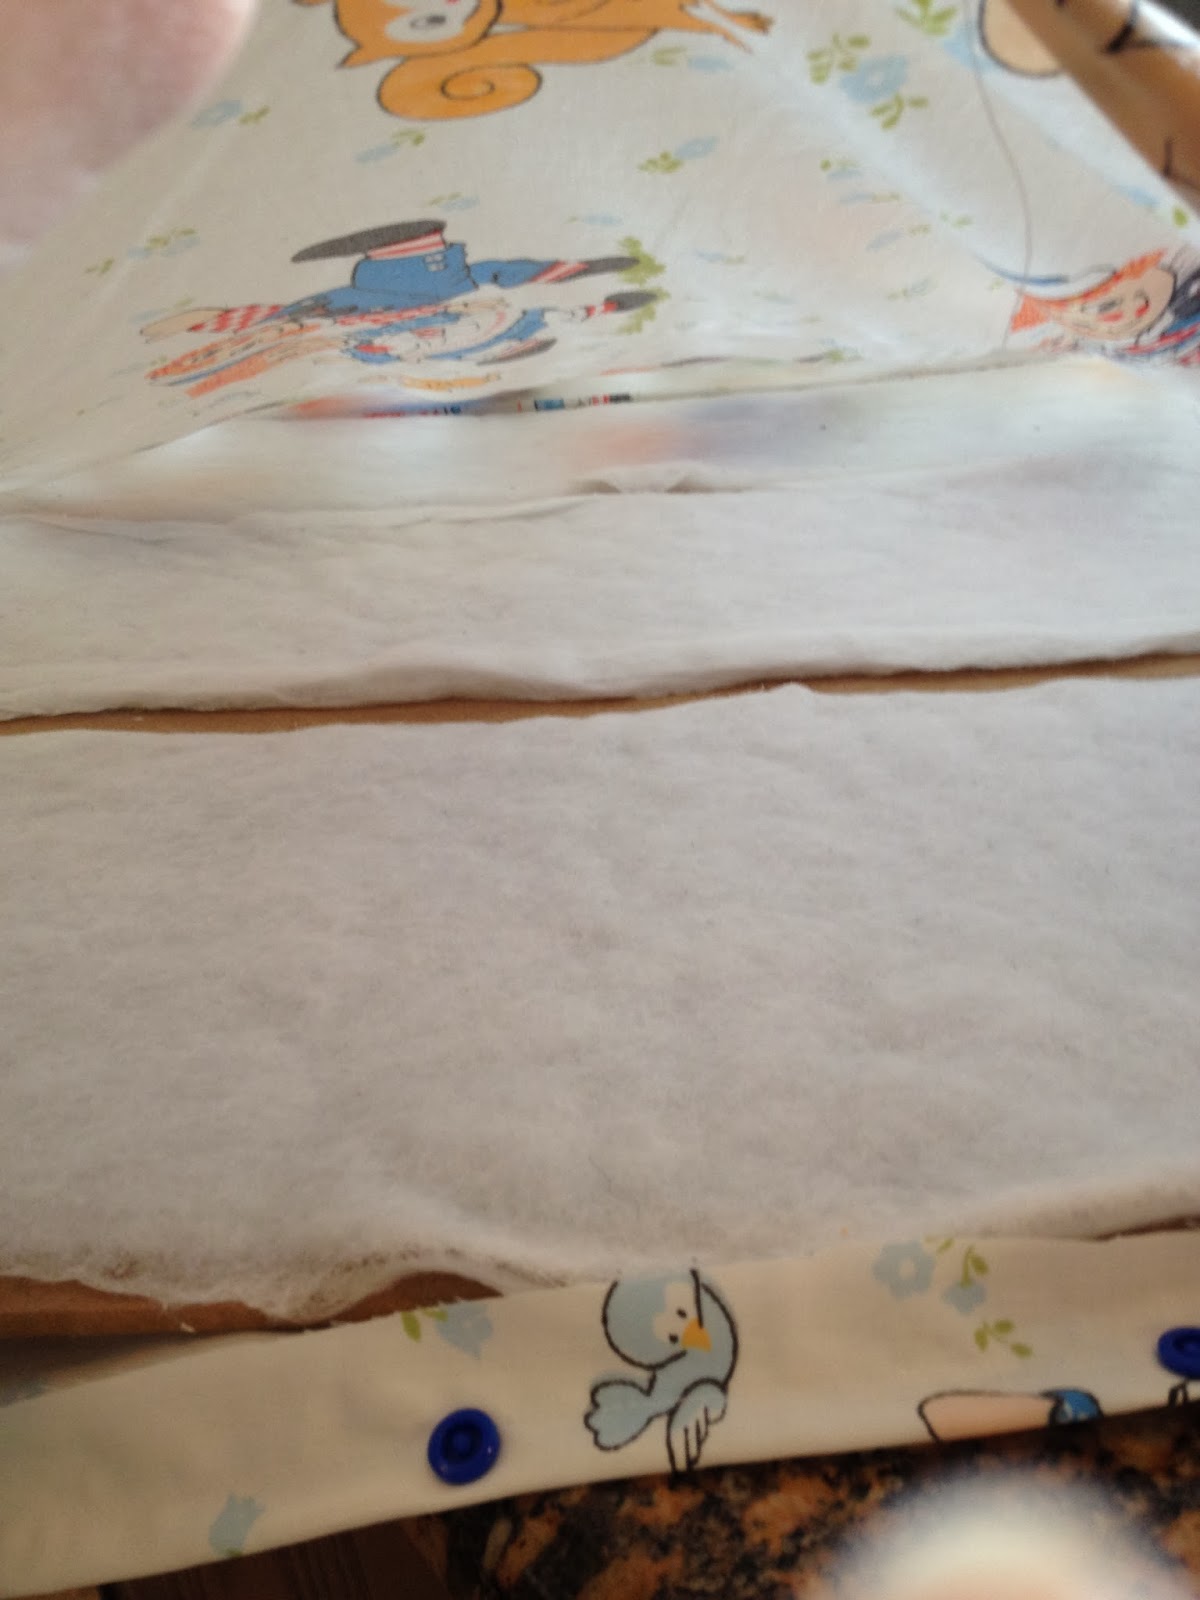
The way the pack and play bottom was constructed was pretty smart. When folded up, the bottom actually wraps around the pack and play and keeps it sturdy while you zip it up into the carrying bag. This means that there are 4 slats inside, allowing it to wrap around the folded item. When unfolded, you simply unroll the mat, and place it in the bottom. Smart. It also meant, that I needed my measurements to be exact, or risk it not fitting anymore. Scary.

So I measured and measured and measured again. Then I sketched. And plotted.

Then I cut. The first part was pretty easy, a big rectangle. Actually, 2 big rectangles. Sewed up on three sides with a hole at one end to insert the slats. I put the slats in, careful not to overlap, and realized I had a bit of room on each end, so I top stitched about an in in, creating a “Stopper” line for the slats. Then I folded in the end, and hemmed it down. I wanted to leave the end open, so I could remove the slats and wash when the fabric got dirty. We know it’s going to happen, it’s a matter of when and with what. Such is the nature of raising children am I right?


So I opted for snaps. Velcro could work, but with kids eating in there and stuff, I imagined it filling up with crumbs and other various grossness. No thanks.

I have snap pliers and plastic snaps, though metal would work as well. I added 6 (or was it 8?) snaps to the hemmed open edge, and snapped it up. Then I placed it back into the pack and play, tucked any extra fabric under the bottom piece and admired my work. Not too shabby, and it looks so cute.

Now the pack and play is revived and getting love, and so is my old Raggedy Ann sheet. So fun!

Now to figure out a way to recover the rails….stay tuned,  I have a few ideas kicking around in there

Thursday, February 20, 2014

Thirsties All In One review


     I have been diapering for a long time, through a lot of kids. I only found cloth diapers when I was pregnant with #4 and I have not looked back.

Like most families, we have taken breaks here and there for various reasons, which have been fine too. The great thing with cloth is that it does not have to be an all or nothing proposition. You can use them part time, full time, or any combination that works for you.

I have tried every type of cloth out there. While I love them all, I have to admit to being a lazy diaperer. I did pockets for a long time, but 4 kids over 3 years in pockets, and stuffing gets old really quick. They worked great, fit great, were adorable. But I just felt like I spent so much time stuffing. I got burned out.

I tried All in one, and was in love. Yes they take a tad longer to dry, but the ease of use easily made up for that. When diapering 3 kids full time, or even twins full time, ease of use made a big difference for me. My kids are sensitive to feeling wet, so I needed a stay dry inner, which is pretty easy to find in AIO. 

I have two favorites, that I love equally. It truly is a toss up. Both have wonderful fit and function.

I previously gave my opinion on the Diaper Rite AIO (find that here), and today I will be offering up a review on the Thirsties Brand AIO size 2 (I have tried size 1 and it's the same opinion, just a smaller size. But we've outgrown them and the new boy isn't here yet for me to test on him.) Find info about the AIO here

I have 3 of these diapers and they all are in the same condition. One of the diapers started to lose stitching on the landing strip on the front, Thirsties has amazing customer service (contact them here). I called them up, asked them to send me a replacement strip so I could repair it myself, after all, the diaper was well loved here, and I certainly did not consider it to be the fault of the company. As with all textiles, when diapers get used, eventually things need repair. Instead, they replaced the entire diaper with a brand new one. All without me asking. I would have been happy to replace the velcro, but they sent me a brand new diaper. Amazing. Customer Service seems to be dead in a lot of companies these days, but Thirsties still believes in going above and beyond. Impressive.

I have these diapers in Aplix, my one complaint is that Thirsties snap diapers do not have hip snaps, which means my skinny legged kiddos have issues wearing them. So we use aplix. I get a great fit every time, and have no problems with their Aplix diapers. Thirsties Aplix is strong and sturdy, but still soft so if/when it does touch baby's belly, you do not have to worry about scratching that precious little skin.

My twins are 2 years old now and about 23 lbs. We are in size 2 AIO, on the second rise snap. I could easily see these diapers fitting my kids for a very long time. They are petite weight wise, so perhaps a heavier toddler of the same age may not get quite the life out of these that we will. But for us, they will last to potty training with not issues.


They fit super snug, but the leg elastic is cushy, and we never have red marks. 


My favorite thing about this AIO is the tunnel design. The insert is sewn down a long the sides, but is open in the front and back. 


This means you can add doublers if you need, and they can go under the insert. So you keep your stay dry topper. Which is awesome. I have been able to put two additional fluffy inserts in that tunnel, and had zero issues with fit. The aplix allows for a great fit even stuffed to extreme.

I have used these diapers overnight double or triple stuffed. Day time with no additional inserts.  Each and every time, I can count on them to perform wonderfully. 

And again, when my tabs needed replacing, I called Thirties to buy new sets, and they mailed them for free. Not at all what I was expecting. I would have been more than happy to buy a replacement kit, again, these diapers get a lot of love here, and it is certainly not Thirsties fault that the tabs wear out. It is the nature of textiles. But they went above and beyond again.

I am blown away by their service. One of the best companies, in any industry, that I have dealt with over the last few years as far as service to the customer goes. Ah-mazing, I cannot sing their praises enough.

I have used several Thirsties items over my diapering career, covers, the old style sized AIO with the pockets, the duo pocket and now the duo AIO. I have never been disappointed. Never. 

I will be buying more of these for sure

Wednesday, February 19, 2014

A new stitch, a new hat, a new baby

A while ago, I learned a new crochet stitch. Actually it's an old stitch, but I had never seen it before. Neither had the woman who posted about it (that post lead me to want to learn it).

What's awesome about the stitch is that it gives crochet work a knit look. While I love the knit look, I do not knit; I tried for a while and failed miserably. Something about operating two needles threw me for a loop. Not to mention, my carpal tunnel was having none of it. Too much physical and mental pain to continue. 
So I picked up crochet instead.

I found this stitch, the waistcoat stitch via a Facebook post, which led to a blog post and a Youtube video. Excellent video of the stitch being worked


I was hooked (corny I know). It is a great stitch for in the round work, though I wouldn't do it for back and forth row work, as it's meant to be fastened off at the end of each row and only worked in one way. This would be a lot of ends to weave in. Of course it's doable, just not my thing.

It works great for hats, and other things made in the round. I made an adorable pair of longies:


That yarn is from Lollytree, who has amazing wool yarns. I would spend a ton of money with her if I could check her out: Lolly tree yarn

Today I will be showing you an adorable newborn hat.
A few things to note with this particular stitch:

It can be slow going, it can be harder on the hands, and it is easier to do if you keep your crocheting a little loose. It is also helpful sometimes to go up a hook size from what you would normally do. This stitch does not have as much stretch as normal crochet, so you need to be sure your finished measurements will work for your item, especially if it’s a garment or hat that needs to fit onto a person vs a blanket or something.

It's adorable, but I do find it takes me longer to use than a standard crochet stitch. So be prepared for it to take a little longer than you normally would.

Supplies:
G hook
Caron Simply Soft: chocolate
Caron Simply Soft: soft blue
Yarn needle

I started this one at the brim and worked my way up.

With brown-chain 6, SC in 2nd chain from hook and across (5 SC) turn
**SC in back loops of each SC across (5 SC) turn**
Repeat from ** until you reach 12-13 inches in length without stretching it
Fold ribbing in half and slip stitch together to form a circle. 


This will be the bottom of the hat

SC in the end of each row around the loop, in my case I had 48 rows, of ribbing, which formed the bottom of the hat, and then 48 SCs which would be my first row of the hat.


At the 2nd row is where you will begin the waistcoat stitch, working into the posts of the SC’s on the first row. Place a marker, and work in rounds without joining.

I included a picture of round 4, so you could see the stitch better as the brown doesn't really photograph well. See those adorable little V's so common with knit?


Use whatever color changing method you prefer, I saw an awesome new one yesterday, which is Ah-mazing and I will be adding it to my rotation.

Round 2: WC in every SC around (48 WC)
Round 3: WC in every WC around (48 WC)
You should now have 3 rows of brown
Round 4-6: Change to soft blue, complete 3 rows of WC around
Round 7-12: Change to chocolate; complete 6 rows of WC around
Round 13-14 Change to soft blue, complete 2 rows of WC around
Round 15-22: Change to chocolate, and continue until you reach the top of the hat, for me that was 7 more rounds.

For a newborn hat, we want 12-13 inches around and 5 inches tall, including our ribbing. For me, that worked out to a total of 22 rounds.
You could easily go larger around and taller, to get whatever size you like.


Once you get to this point, we are going to turn the hat inside out to sew it together, so remove your hook. Flip the hat inside out; re-insert your hook and SS the two sides together. Alternatively, you could cut a long tail on the yarn and whip stitch together with a yarn needle, your choice.

Here it is from the inside, in this version, I SS the sides together. Ignore all my ends, I need to weave in and trim.


Fasten off and weave in ends.

As my newborn is not here yet, I do not have an action shot, but I will certainly get one when I can.


You could add pompoms to the corners if you like, but I felt they were a little too girly. If you did a girly color combo, or don’t mind pompoms on a boy, go right ahead and do what you like. It’d be really cute with some curls coming off the corners as well.

The sky is the limit for sure here.

If I were to remake this, I would have made the brim blue probably, to help it stand out more. But it’s still adorable.

I love that it gives the appearance of knit, while being crochet. That plays right into my skill set. And it looks so cute. Can't wait to see it on a tiny little baby head.